Solar panels are made up of solar panel PV.

Solar panel PV cells, or, photovoltaic cells, are able to capture sunlight and convert the energy into DC voltage. This is the power that is stored or used as electricity for your home.
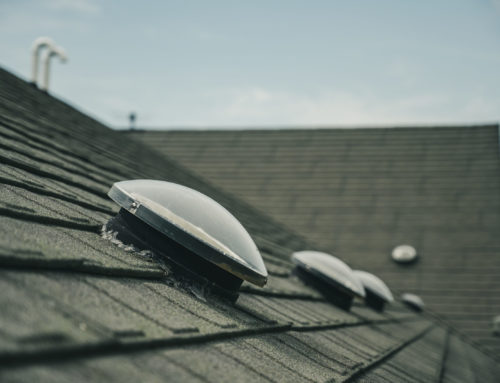
Rooftops are often the most practical place to put solar panels. They receive a lot of direct sunlight, there usually isn’t anything blocking them, and they are sturdy. When the panels are attached, giant bolts hold them in place. This creates a solar panel roof mount. The solar company that installs your panels will drill these mounts into your roof.
Let’s discuss how solar panels are mounted on your roof, and what the solar installation process involves.
Step-by-Step Process for Installing Solar Panels

Step 1:
The first step when installing a solar panel roof mount is to figure out where the stanchions go. Stanchions are giant screws that hold the solar panels in place. The mounting is made to be durable and to withstand what is known as “upforce”, a pull that could rip the panels from the roof. To determine the proper placement of the stanchions, find the rafters in your roof using either your home’s blueprint or a stud finder. The stanchions should be placed at least four feet apart.
Step 2:
The next step is to attach the screws to the roof. Carefully create holes in the rafters using a drill.
Step 3:
Thirdly, put the screws in the holes and secure. Make sure that the upper and lower aluminum rails are secured to the stanchions using bolts. Use an impact driver for maximum tightness. Then, the screws should be sealed. This maintains your home’s thermal envelope. Thermoseal roofing is the best way to do this. It will keep a tight lock on your roof, not letting any of the elements inside. Thermoseal roofing is the way to go. Properly-installed stanchions will not leak.
Step 4:
The fourth step for installing solar panels is to measure the distance from the rails. Place a measuring tape diagonally from the top of one rail to the bottom of the rail directly across from it. Do the same on the other side. These measurements should be exactly equal. If they are, you know that the rails are parallel. If the measurements are not equal, then adjust accordingly.
Step 5:
After you make sure the rails are square, it’s time to install the middle rail. The middle rail should be aligned with the upper and lower rails.
Step 6:
The sixth step brings power to your solar panels. It involves putting wires into your panels and running them to your power inverter kits, creating your conductor systems. Then, you will install a power inverter kits underneath every one of your panels. Then install some 6-gauge copper grounding wire onto your inverters. This finishes the conductor systems. These wire connections should be connected from one solar array to the next one.
The Last Step:
Finally, you will place the panels on top of the previously-installed stanchions. The plug connections need to be joined and the retaining clips must be screwed onto the rails to ensure that the panels are secure.
Once you have finished the previous step, it is time to move on to more electrical work. Extend some wires from your panels and connect them to an electrical meter. The wires also need to connect to an electrical sub-panel.
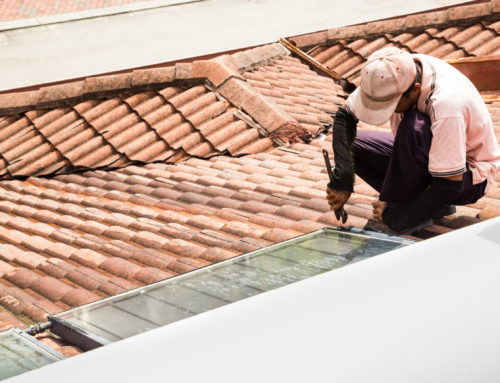
Installing a Solar Panel Roof Mount on Tile Roofs
Putting panels on a tile roof is just like installing panels on a roof with shingles.

To attach solar panels on a tile roof, first, a few tiles must be removed. Then, the tile hooks along with flashings will be attached to the roof. These will hold up the panels securely. Then, the tiles that were removed will be replaced.
The most expensive type of tile roof to put solar panels on is the Spanish roof. This is because when the installers are doing their work, they will inevitably break some tiles by stepping on them. The broken tiles will need to be replaced. Panel installers may take more time working on a Spanish tile roof because they will be extra careful not to break tiles. They will also be replacing tiles that were broken during the installation process. If you have a tile roof, make sure that you have the installers sign a contract specifying the outcome of damages to your tiles.
Installing Panels on a Wood Shake Roof
Wood shake is a stylish and decorative way to build a roof, but the wood pieces are often brittle. Precautions must be taken when installing solar panels. Even though this is the case, the solar panel mount installation is actually quite simple. The panel installer will find them under a layer of the shake roof to secure the panels.
Solar Panels for Standing-Seam Metal Roofs

A metal roof that has upright seams going down them are great for solar panel installation. There aren’t any holes that need to be drilled as a mounting clamp can be secured on the standing seam. The solar array will last a long time on this type of roof. Standing-seam metal roofs are great for solar panels because they offer a place for the air under the array to circulate. This makes the panels more efficient.
Other Ways to Mount Solar Panels

Flat Roof Systems
Flat Roof systems are just like traditional solar systems, just on a flat roof. They are often less trouble to install, with fewer holes that need to be drilled. Flat roof systems are often used for big-box stores and tall office buildings.
Solar Panels Ground Mounted
If installing solar panels on your roof is not an option, consider mounting them on the ground. If you have an open space, solar panels that are ground mounted might be your best option. The benefits of having solar panels ground mounted are that they can face any direction and they are easier to install. They are not constrained by the makeup of your roof!
Roof Space Converters
If you don’t have a large roof, or if you cannot mount the panels on the ground, roof space converters might be your best option. Roof space conversion adds more space to the roof, the result being a bigger attic and more room for solar panels.
Portable Solar Panels
A portable solar array might be for you if you want to take your panels to a different location, often on camping and RV trips. A portable solar array is ideal for smaller energy needs. If you are looking at getting solar panels that are portable, it might be a good idea to invest in some solar charger power packs. You portable solar panels will send energy to be stored in the solar charger power packs.
Powering Your Panels
Another option to consider is the DIY solar generator. Making a DIY solar generator will save you money up-front and it could be a fun project.
SunPower Solar Cells
If you’re looking for top-of-the-line solar cells for your solar panel project, you want SunPower solar cells. These cells have a solid copper foundation, pure silicon, and a unique surface. These traits come together to gather more energy than the average panel. Over time, SunPower solar cells produce 60% more energy than conventional panels over the span of 25 years.
Solar Panel Kits
Solar panel kits are a great option if you would like all your hardware and supplies available together for purchase. Solar panel kits make things super simple. All you have to do is install them!